
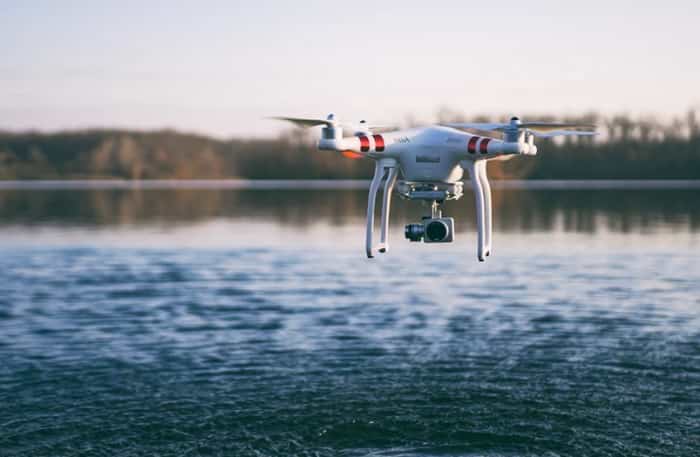
Your drone begins to descend over a big body of water. You know it’s too far to reach, you frantically try to regain control, your heart sinks…then splash, your drone hits the water.
Don’t panic! I’m here to help.
When trying to fix a water damaged drone, our mission is to get it as clean, and as dry as possible before powering it back on.
This guide will show you step-by-step on how you fix a water damaged drone as quickly and effectively as possible.
- Check for danger and get your drone out of the water as soon as possible.
- Switch off your drone and remove the battery.
- If the UAV landed in saltwater, muddy water, ‘soda or coffee,’ then rinse it with fresh water.
- Take your drone apart as best as you can.
- Remove any storage media.
- Dry it out using heat and air.
- Leave it drying for 24 hours MINIMUM.
- Check your drones warranty.
Ready to get stuck in to the details? Let’s DIVE right in… bad joke?!
Step 01. Get The Drone Out Of The Water Safely
Before running into the water and trying to save your drone, check for any potential danger. You don’t want to be risking your own life to save the life of a toy. Your parent, your wife, and most definitely the fire department will not be happy with you. So check for danger before jumping in the water. Once you’re convinced it’s safe, move on to step 01.
Step 02. Switch Off The Drone And Remove The Battery
The second your drone hits the water the ESCs, (electronic speed regulators,) will probably pop like a fuse. These little regulators regulate how much power gets sent to each motor.
This means that your drone will more than likely be turned off already once you get your hands on it, but make sure you check that it’s off just in case.
Then immediately take out your battery. Lithium polymer batteries can explode even if they are submerged into water. The water causes them to short circuit, so make sure you remove the battery as soon as possible and don’t try to use it again. Unfortunately, it’s not worth trying to see if the battery is still working, it could cause all sorts of havoc, so get rid of it safely.
Step 03. If The UAV Landed In Saltwater, Muddy Water, Coffee Or Soda… Rinse It With Fresh Water
If your drone landed in saltwater or got water damage from ANYTHING that has a lot of contaminants such as mud or soda, then your problem is a bit bigger.
Your mission, in this case, is to remove as much of the salt/mud/sugar residue off your drone as soon as possible. These contaminants on the electronics of your drone can cause irreversible damage, it literally eats its way into wires, chips, and electric boards.
As soon as you have switched it off and removed the battery, dunk your drone on a bucket or bath of freshwater and wiggle it around for a few seconds. And repeat about two times, you can’t risk leaving any salt residue on your drone. This can’t cause any more damage because there is no current going through the drone.
The reason why your drone gets damaged in the first place when being underwater is because the water causes a bunch of short circuits within its electronics. If there was no current, it wouldn’t happen.
INSIDER TIP: If you want to give your drone the best shot of survival, give it 99% isopropanol alcohol, (also known as rubbing alcohol,) bath. The work extremely well and work by actually displacing water and evaporating very quickly at room temperature. You can grab a bottle from CVS or Walmart for about $20. Warning, use this as a last resort, it could damage adhesives and seals.
Step 04. Take Apart Your Drone As Best As Possible
A complete dissembly isn’t really necessary, however you need to at-least try to take apart your UAV as much as possible. The more barriers you can remove between yourself and the internal components, the faster heat and air can reach those areas to dry them.
If you’re not sure how to take apart your drone, here are a few directions for some of the more popular drones. If you don’t see your drone below then find a video on YouTube or check your drones manuals.
How to take apart a DJI Phantom 3.
- First, remove the props by using the motor vice. Clam the vise over the motors, then spin the propellers in the proper direction. The direction is different on each motor.
- Next, you’re going to want to remove the camera. Use a small flat screwdriver to pry off the plastic locknuts.
- Then, unplug the white cable from underneath the camera.
- Now you’re going to want to unplug the grey antenna cable. Remove the two screws above each of the wireless antenna covers. Then you can pop off the cover, and plug out the grey antenna wire from the camera.
- Follow the same method for the other antenna on the camera.
- Next, unplug the black cable that goes into the camera. This can simply be done by popping off the cover that covers the plug.
- Then remove the camera.
- Next, the four screws of the gimbal mount will be exposed. Unscrew them and then remove the mount from the drone body.
- To remove the landing gear, first, pry out the antennas from either side, then remove the rubber gasket where the landing gear meets the belly of the drone. Use tweezers or a small screwdriver.
- Remove the four screws from the landing gear, then the landing gear can be removed. Do the same procedure for the opposite side landing gear.
- Next, you’re going to want to open the drone body. Start by removing the two screws right above the motor mounts on each arm of the drone.
- Then, remove the screws on the tips of the arms.
- Now, remove the screws in the middle of the arms.
- Before pulling the body apart, you’re going to have to peel back the stickers on each arm of the drone just past the seam.
- Start prying off the upper part of the drone, once it clips off to make sure you don’t rip it off.
- Maneuver it side-way and expose the internal components so that you can unplug the GPS cable from the drones’ motherboard.
- Your drone should now be apart enough so that heat and air can get to all of the components in your drone.
How to take apart a DJI Mavi.
Start out by removing the memory card.
Next we’re going to want to remove the belly of the drone by taking off 8 screws. You’re going to need a 1.5 hex bit.
The housing should now lift off. It’s going to be pretty tighs on there so pry it.
This should open your drone up enough to get air and heat through the internal components. However if you want to take it apart more, I left a video below that will show you how.
If your drone isn’t listed above, do a quick search on “how to take apart [YOUR DRONE TYPE].” You should get more than enough helpful videos.
Step 05. Remove Any Storage Media
This includes any memory cards that your drone might come with. Or literally anything that hold some kind of information.
This includes SSD drives, USB sticks, sim cards, SD’s. Once you’ve taken them out, then dry them with the steps I’m about to give you. It’s very possible that the media on these will still be there, however, don’t try to access it until you dry them properly first.
Step 06. Dry Out Your UAV With Heat And Air
Your drone should be as open and exposed as possible by now, with all media devices and batteries removed.
Shake away excess water.
The first thing you’re going to want to do is to shake any excess water out of your drone, literally swing it in half circles and let gravity do the work for you.
Wipe any surface you can reach with a cloth.
And I mean ANY. Both outside and inside of your drone, get into as many nooks and crannies as possible. Use a cloth that’s great at absorbing water. I like to use a shammy cleaning cloth, they work great and you can pick them up at any major store for a few dollars.
Follow basic principles for evaporating water.
With enough heat and airflow, the water on your drone will evaporate, that being said, you’re not limited to what you can use. As long as you have those two elements then it will evaporate the water out of your drone.
IMPORTANT NOTE: Avoid anything too hot. There’s a misconception that hair dryers are fine to use, but that’s simply not true. It’s very easy to overheat with a hair dryer so I would avoid this methods completely.
Heat and air methods you can try.
Keeping in mind that direct heat could damage your drone, your options are limited, however there are some house hold items you can use.
Oven method.
- Place your drone on the lid of your oven, and set it at a very low hear. Low enough to only feel like a warm heater.
- Next, set up a stand fan pointing towards the drone. Place the fan to the side of the drone so that the airflow doesn’t blow the heat back into the oven.
- Leave for 24 hours.
Heater method.
- If you have a heater at home, place it next to your drone. Use your discretion when deciding how far away from the heater you place it. If you put your hand where the drone is, and you can’t hold your hand there for long, then it’s way too hot. It should just be a bit of warmth.
- Set up your stand fan. If you can place it in a direction where the fan blows the heat into the direction of the drone that would be ideal. You don’t want the fan to end up blowing the heat away from the drone.
- Leave it to fry for 24 hours.
Fire place method.
If you don’t have an oven or a heater, hopefully, you have a fireplace. But be careful when trying this. You don’t have as much control of the heat the fireplace produces, so it will be a lot harder to judge the temperature.
- Place your drone as far away from the fireplace as possible. In a position where you’re feeling some warmth glow through your hand.
- Place the fan in a position where it’s blowing the heat into your drone. DO NOT face the fan towards the fire.
- Keep your drone drying for 24 hours.
Car heater method.
If you’re willing to keep your car running for 24 hours then this could be your best option. Your car should be fitter with a heater fan.
- So all you need to do here is place your drone on the car seat.
- Point all a/c vents towards your drone.
- Switch on the heater at a moderate temperature, then pump up the airflow as high as possible.
- Check on everything every few hours. I wouldn’t advise leaving your car running overnight, so you could do it in four-hour segments.
- But before you switch your drone back on, make sure it’s been under the heat for a total of 24 hours.
‘Drying’ methods you should stay away from!
You’ve seen and heard about these methods, and maybe you’ve even tried them. Some people believe that burying your water damaged electronics in…. sand, rice, oats, cat litter, and even couscous out of all things, can help dry them out.
I would advise against this, these methods are not as effective, and they can actually cause further damage to your beloved UAV. In some cases, the contaminants from these materials can dissolve into the water on a motherboard for example and can cause corrosion and irreversible damage.
Remember the principles for evaporating water? Try to stick to them. They work!
Step 07. Wait With PATIENCE For A Minimum Of 24 hours
Remember that it’s not the water that damages your drone, it’s the short circuiting that happens when electrcity goes through your drone. So if you try to use your drone again too early then you might cause more damage to it. On that note, be absolutely sure that your drone is as dry as a cork. Leave it to dry for a minimum of 24 hours, no sooner!
This gives you some time to do some research on the next point
Step 08. Check If Warranty Covers Water Damage
In most cases drone manufacturers won’t cover water damage, however, it’s still worth looking it up. Just to give you an example, DJI won’t cover damage caused by pilot error. If they did, they would probably be out of business. But I would still give your drone manufacturer a call to double-check this. Just don’t lie and say your drone just stopped working, water damage can be spotted from a mile away.
Final Thoughts
Even if you do manage to get your drone operating again, chances are that something will be broken. There a hundreds of different components that do hunderds of different tasts. That being said, if your drone does act a bit funky after you’ve managed to salvage it, look for a technician that could help you fix it.
And to avoid running into the same problem again, get some drone insurance that will cover water damage. Especially if you’re the guy that frequently flies your drone over water. It’s just a matter of time before it will happen again.