
The Mavic Air is a great drone and its portability makes it a top choice for a lot of drone enthusiasts when it comes to fishing.
The Mavic Air has some pretty impressive specs that make it an ideal drone to use for fishing. It has a flight time of 21 minutes and a range of 2.4 miles, which is more time and distance you need for both scouting and casting. The Mavic Air also comes with a clear 4K camera that makes it easy to spot fish from high altitudes.
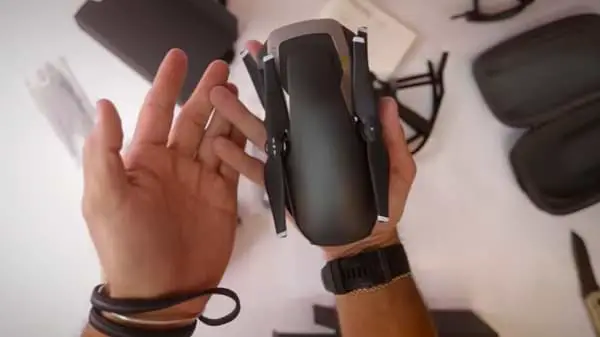
To find out more about the DJI Mavic Air and exactly how to use it as a fishing drone, keep reading below!
What Makes The Mavic Air a Great Fishing Drone?
The DJI Mavic Air is an amazing little drone that is easy to fly and great for beginners! The Air combines the great aspects of the Mavic Pro, with the portability and compatibility of the DJI Spark.
All this while still adding better obstacle avoidance and an improved 4K camera to the drone—nice!
I recommend this drone to anyone who is new to droning and wants a drone that does more than just take selfies.
4k video quality camera.
The Mavic Air takes a stunning 4K video making it great for scouting the surface of the water for schools of fish.
Flight Time of 21 minutes.
The flight time of 21 minutes will allow you to spend quite some time out on the lake or at sea when drone fishing.
Range of 2.48 miles.
The Air has a maximum range of 2.48 miles which is quite the distance. The drone can take your line far out to allow you to catch fish at a distance you wouldn’t normally be able to reach.
Payload of 200g.
The drone has a max payload of 200g, which is a lot considering the drone only weighs 430g!
The Air can carry more than that, but I don’t recommend pushing it to the limit because it might end with the drone in the water instead of next to you!
So, why is this important?
In order to be used to drone fish, the drone needs to be able to carry the fishing line to the desired location quite a distance away from the pilot and still be able to hover around and drop the line.
Attached to the line is usually bait or a lure in order to entice the fish, however, the bait and lures are not weightless and usually vary in weight.
This means that if the drone can’t carry the weight of the bait and lure then you can’t use it as a fishing drone, and that is why a lot of people were skeptical about the Mavic Air.
But, not to worry! Many enthusiasts have tested the Mavic Air and confirmed that it can be used as a fishing drone. In fact, companies like Gannet have developed bait release systems for the Mavic Air!
2 Mavic Air Bait Release Systems
01. Gannet Bait Release (Paid method)
The Gannet company makes the world’s best fishing drones and bait release systems on the market.
Gannet makes a wide variety of bait release systems for a lot of different drones, but because DJI is the leading producer of consumer drones, Gannet mostly makes bait release systems for their drones.
DJI drones have sensors on the bottom for obstacle avoidance and landing, because of this, Gannet had to design the bait release with this in mind.
Gannet designed its drone bait release system in a way that doesn’t interfere with any of these sensors on the drone.
The attachment fits very well on the drone and does not interfere with any of the sensors.
Gannet makes some of the most reliable bait release systems and is recognized internationally by many drone anglers.
What makes them so great?
- It is a fully automatic mechanical release system mainly used for drone fishing but can be repurposed.
- The Gannet is the standard model that fits most Mavic drones but specifically designed to be used with the Mavic Air.
- The release system is very lightweight, weighing less than 50 grams.
- They are designed to not interfere with your drone’s Visual Positioning Sensors.
- You can mount the Gannet in seconds with no tools required.
- It can do more than 50 drops on a single charge.
- You do not need to modify your drone at all because the system merely clips or straps on.
How to Attach Bait Release:
The Gannet bait release system is really easy to attach to any drone. They are built specifically to be attached to a drone without disturbing the propellers or any of the sensors or cameras that might be on the drone.
DJI Mavic Pro Attachment Steps:
Step 1: Flip drone over so the landing gear is facing the ceiling or sky.
Step 2: Place the Gannet bait release system on the bottom with the logo and dial indicator facing the front.
Step 3: Position the Gannet between downward sensors and auxiliary lighting.
Step 4: Make sure the attachment is placed this way in order to avoid the sensors.
Step 5: Bring the strap around the drone and hook it to the other end of the release system.
Step 6: Flip drone over and you are ready to go.
Step 7: Attach the fishing line to the Gannet and take off!
02. Coat Hanger Bait Release (Free method)
Now you might be thinking this is a weird method to use for drone fishing, but if you are looking for a way to attach a fishing line to your Mavic drone and still keep your costs down, then you should take a look at this.
The Mavic Air is a great drone for a low price, and the items you will need to make this bait release system should already be in your house.
This method will require you to modify a coat hanger in a way that will allow you to attach it to the Mavic drone, and then you can attach a fishing line to the drone.
What you will need:
- Zip ties
- Coat hanger
- Wire cutters
Tips:
- Do not use a coat hanger that flexes too much, rather try to find a coat hanger that is a bit stiffer.
- When attaching the coat hanger to the drone, make sure not to cover any of the sensors or the cameras underneath the drone.
Step 1: Cut the looping part (hook) of the coat hanger. Make sure to cut a decent length but still short enough so it fits on the Mavic Air.
Step 2: Open up the arms of your drone.
Step 3: Flip drone over.
Step 4: Place the coat hanger hook in the center of the drone, but also slightly to the right, so you are not covering the sensors.
Step 5: When you have placed the hook and you know which section of the drone you will be tying it to, remove the plastic covering the straight part of the coat hanger.
Step 6: Place the coat hanger on the drone.
Step 7: Zip tie the hanger to the drone. Try to zip tie the hanger near the corner so you are still able to remove the battery while the zip tie is attached.
Step 8: Make sure the coat hanger is secure and you are ready to go.
Step 9: Loop the line on the coat hanger and you are free to take off.
Related Questions
Does the Mavic Air have fish finder?
The Mavic Air does not actually have a fish finder feature from DJI. However, The Raymarine Axiom GPS/fishfinder UAV app now makes Mavic drones the ideal fishing partner. The app combines advanced UAV(unmanned aerial vehicle) imaging with the navigation system of the Mavic and simplifies the operation of both these technologies.